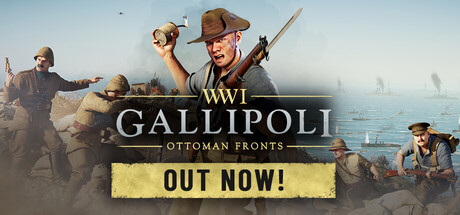
It’s high time we introduce you to Hanna! No, not a person, but a new map coming to Gallipoli in just two weeks: December 3rd!
The Battle of Hanna
After the 6th (Poona) Division of the Indian Army under General Charles Townshend had been defeated at the Battle of Ctesiphon it retreated back to Kut where the Ottomans besieged it. Whilst supplies were low, Townshend sent various messages that underestimate how much food and ammunition he possessed. His hope was that this would speed up relief efforts. Instead it forced the British to try and break the siege with forces that were not yet ready.
 A 60-pounder field gun during the Battle of Hanna, January 1916. NAM. 1983-12-72-33
A relief force composed of British and Indian soldiers and led by Lieutenant General Fenton Aylmer attempted to march along the Tigris to Kut’s aid. They were soon confronted by Ottoman trenches between the banks of the Tigris and the Suwaikiya Marshes in the Hanna Defile. Recognising the need to assist Townshend at Kut, Aylmer attacked in terrible conditions.
A raging storm had blown in and the heavy rain caused the Tigris to break its banks and flood the battlefield. As the attackers tried to wade across No Man’s Land, Ottomans found themselves in rapidly waterlogged trenches. The battlefield quickly came to resemble Flanders on the Western Front. Whilst conditions for the Ottomans were difficult, the mud and water made attacking almost impossible. British casualties were significant as they were targeted by concentrated fire and forced to withdraw. The defenders of Kut were left to endure the siege with little hope of relief.
 By East India Company, the Board of Control, the India Office, or other British Government Department - https://www.qdl.qa/en/archive/81055/vdc_100025551852.0x000001, OGL 2.
Hanna
If you’ve played Verdun, you’ll feel right at home on Hanna: torrential rain, mud, and submerged trenches are the name of the game. Hope you brought your wellies!
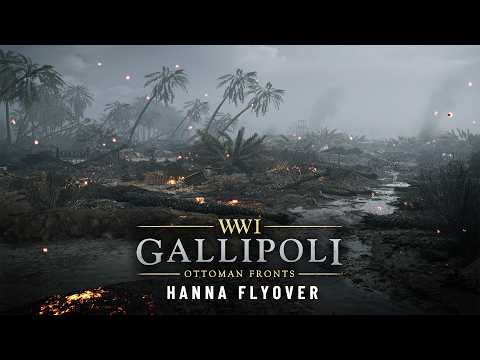
The attackers start their assault on the Ottoman fort with the river Tigris to their left, and marshes to their right.
The initial approach is a flat no man’s land with sections of barbed wire. Your cover is limited to a dried up riverbed (which happens to be quite wet right now) and the craters from artillery impacts. Do keep in mind that going prone in a crater may mean you stick your head underwater, and you could drown.

Rainwater has accumulated quite a bit in the objective on the attackers' left. Plodding through these trenches is a slow process, making a swift retreat next to impossible. You’ll want to be prepared before you take the plunge.
On the right, the objective is further away from the river Tigris, so the ground isn’t as saturated and water levels are more puddle-level.

Sector 2 consists of proper marshland. While the leftmost objective sits a bit higher and is relatively accessible, the rightmost objective sits in the middle of a pond, surrounded by tall reeds. The reeds can be used for a slow but stealthy approach, as the enemy will not be able to see you coming. However, reeds work both ways, and looking out of the reeds is just as difficult as looking in. The water itself is about knee-deep in some sections, enough to slow you down quite a bit.

If you’re not looking to splash about, you can use the boardwalks to quickly get to the objective. However, your path will be very predictable. The objective itself is a small outpost with a handful of thatched huts.

The approach to the final Ottoman Headquarters is an arduous one. Running along the bank of the water puts you at the mercy of rapids: the riverbank gave way and the water from the Tigris is rapidly flowing in. It gets up to your waist in some spots, or to your neck if crouched. Some of the Ottoman defenses on this side haven’t been washed away.

In the marsh the reeds still provide the best cover the British can get. It’s slow going, but you can get right up to some Ottoman defenses you can repurpose as a forward base. There are some faster routes available, but they lack cover.
The area opens up for the last run to the Headquarters. Worse still, the Headquarters is the fort, with walls the Ottomans can look over and fire from a well-protected vantage point. British artillery made the terrain uneven, and some trenches still remain. These can be used to get closer to the fort and fight your way in.

That's all we'll show today! We'll be back very soon to discuss the new weapons and the two new cosmetic DLCs that are coming on December 3rd as well. See you then!