Version 0.2.0 introduced an integrated mod loader and proper mod support into the game. This tutorial will quickly walk you through it's usage as well as the mod creation process.
Installing Mods
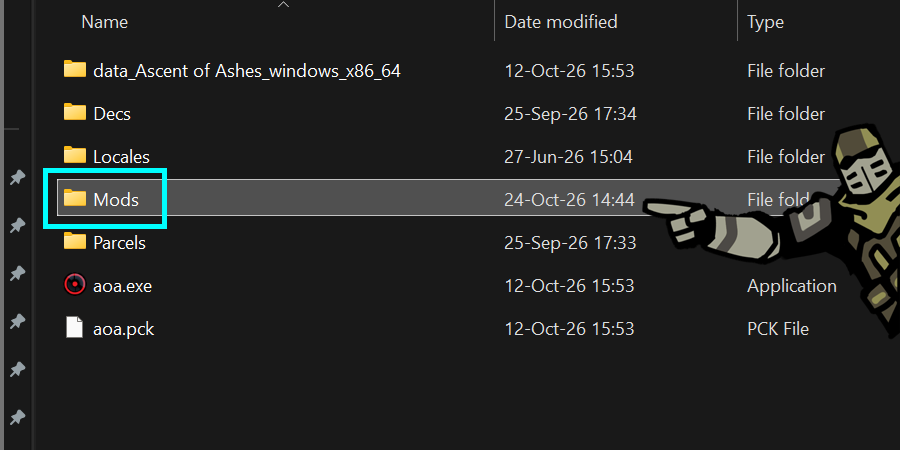
Mod installation is very straight-forward. Simply open the game folder (the same place where the executable resides) and you should see a folder called "Mods". By default it is empty. Simply drop your mod folder in and launch the game.
From the main menu, you can use the "Mods" button to open the mod manager. If your mod was properly installed, you should see it listed here. Toggle the checkbox next to the mod name to enable/disable it. Use the arrow buttons to adjust the mod's position in your load order. Mods higher up in the list load first. If two mods try to edit the same thing, the one lower in the list will take precedence.

Once you confirm the new load order the game will prompt you to restart. This will cause the application to close and launch with the new mod settings applied. From here, start the game as normal and you should see your changes ingame. Keep in mind that fundamental changes to the game's code, entities, etc. are likely to break existing saves. Therefore, changing your mod list on an existing playthrough is not recommended.
Creating Mods
The mod framework is designed to be accessible yet powerful. This example will walk you through the creation of a basic "Hello World" mod. It will print a "Hello World" message to the console any time someone equips a costume hat.
Creating A New Mod
First, navigate to the "Mods" folder of your game installation (see the "Installing Mods" section above). Create a new subdirectory for your mod. Next, open the folder you just created. Here we need to create two new folders called "Dec" and "Assembly", as well as a new file called "About.xml".

The About.xml file will contain meta data about your mod which will be displayed by the ingame mod manager. It should look like this:

Name: This is the name of your mod as it will be displayed on the UI.
Author: The mod's author (i.e. your name).
ModVersion: The version string of the mod as it will be displayed in the mod manager. It's generally a good idea to follow an established pattern here so users can quickly tell if they have the most up-to-date version or not.
GameVersion: The version of the game the mod was made for. In general, mods can only be expected to work with the version they were made and tested with, so it's important to let users know in case they're trying to load an older mod that isn't up to date with their version of the game.
The About.xml file is how the mod manager identifies mods. If your mod isn't showing up in your mod list at all the most likely cause is an issue with this file.
Creating A Custom Assembly
To insert custom code into the game, we'll need to create an assembly and add it to our mod folder. You will need to navigate to the following folder inside your game directory: data_Ascent of Ashes_windows_x86_64. Here we need to locate these files:
Ascent of Ashes.dll
dec.dll
GodotSharp.dll

In your IDE of choice, create a new .NET solution and set it to "Class Library", language to C#. Add the files above as dependencies. It is recommended that you make copies of them inside your project folder instead of using game files directly to avoid problems down the line. For our example we will create a new class called Apparel_HelloWorld, extending Apparel. This is the base class for all wearable clothing and armor. We'll implement a method called OnEquip() to let our code trigger whenever someone equips this particular piece of apparel. For this demo all we're going to do is print the phrase "Hello World" to the console.
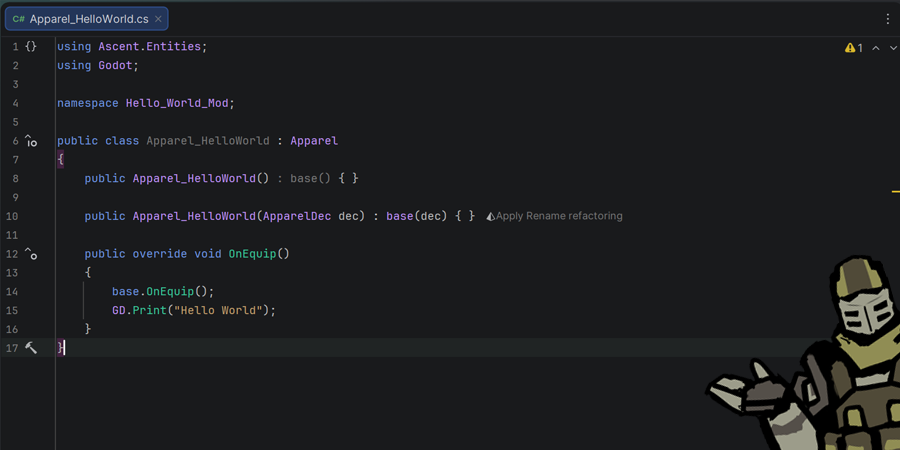
Once you're done writing your code, build your solution. Place the resulting .dll file in the Assembly folder we created earlier and the game should load it when your mod is enabled.
Making XML Changes
We've created a new type of apparel, but in order to make it actually show up in the game we'll need to adjust the game data to hook in our new class. Game data is defined through XML files using a library called "Dec" (short for "Declaration"). You can find all the game's data by navigating to your install directory and opening the "Decs" folder. While it is possible to edit these files directly, any such changes would be invalidated the next time you update the game. Keeping track of changed files would be difficult and any mods that edit the same file would be inherently incompatible with each other. To solve this problem, the game includes an in-depth patching system you can use to make changes dynamically at game launch.
By opening the file under Decs/Entities/Items/Apparel.xml we can see which items are already in the game. A quick search shows us that the costume hat we want to modify has the Dec name "CostumeHat". We'll need this name to make our modifications in the next step.
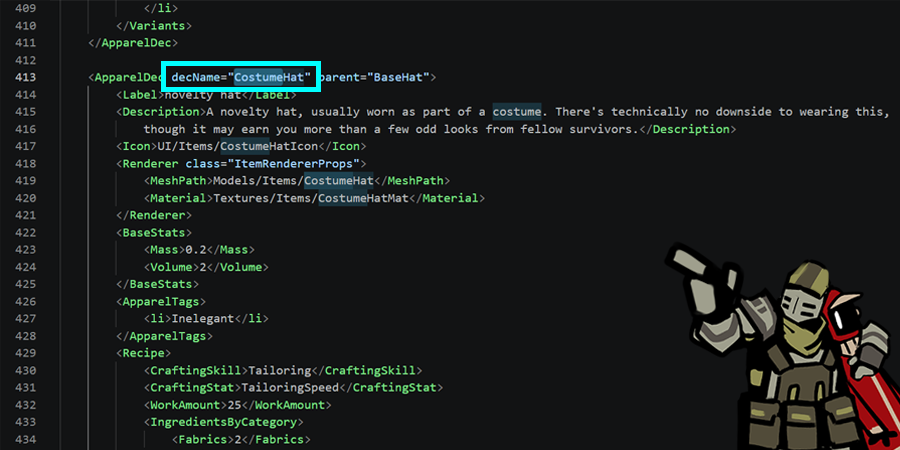
Navigating to our mod directory, we open the "Dec" folder and create a new XML file. The name doesn't matter, but it's a good idea to make it something descriptive. In this XML file we'll create a new ApparelDec with the same name as the one we're trying to modify. We set the merge mode to "patch" to make the values in our XML override the existing values from the base Dec. For more information on merge modes, see the documentation at: https://zorbathut.github.io/dec/release/documentation/mergemodes.html
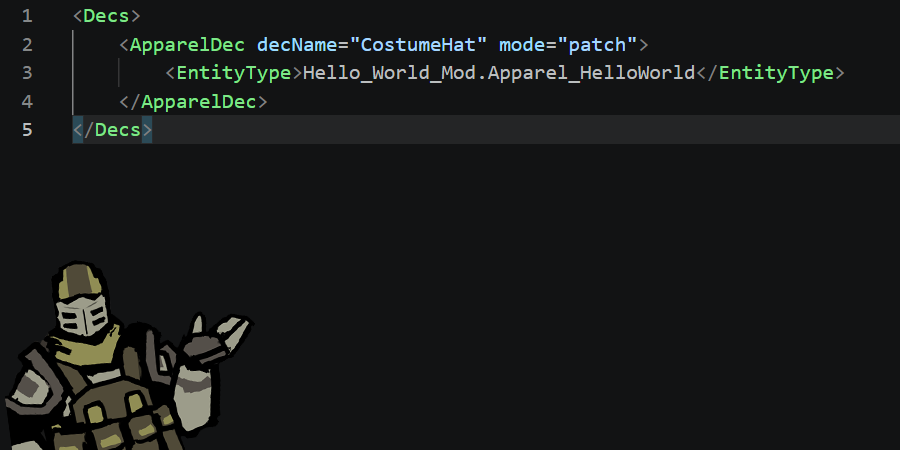
In our case we want to change the hat's EntityType, so we add a node and put in the name of our custom class. For mod-added classes, the name must be assembly-qualified, meaning you need to include the full namespace. For vanilla classes the class name itself is enough.
Testing Your Mod
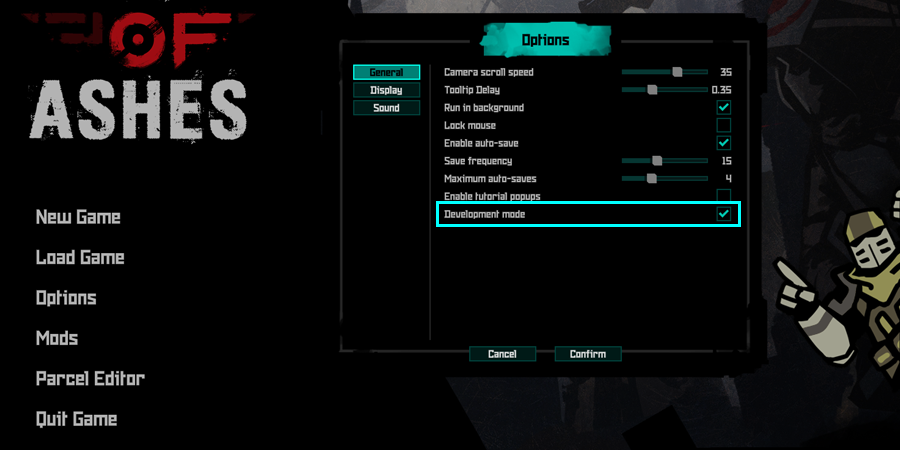
Now that we have our mod set up, it's time to test it ingame. Start the game, open the mod manager and enable your mod. To help with testing and debugging, the game includes the option to activate development mode from the settings menu. This will enable a set of menus providing access to various debug utilities.
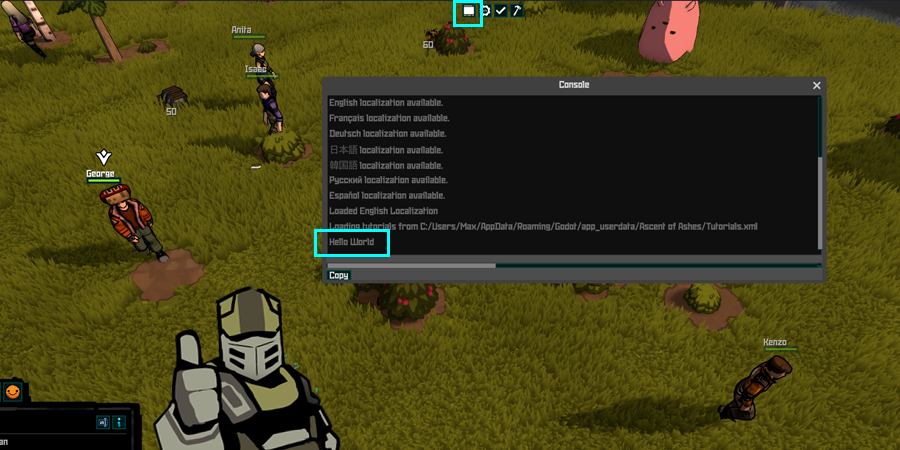
Start a new game and open the dev commands menu (the button with the cog icon) from the UI bar at the top edge of the screen. Select the "Spawn Entity" command and find the costume hat we modified earlier. Spawn it into the world and order a survivor to equip it.

Once equipped, use the console button to bring up the debug console. Scrolling all the way to the bottom, we can see that our message has been printed, confirming that our mod works as intended.
Publishing Your Mod
Now that we're done creating our mod it's time to publish it. All that's left to do is compress the mod folder into a .zip file and upload it to a file host of your choice, then let people know about your new creation. A good place to start would be our official Discord which has a dedicated subchannel for mods. You can download the Hello World mod from here.
