The lava is a weapon
On most maps your only variables are the enemy team and the terrain. Here you have a hazard that can work for or against you depending on who is paying attention. It punishes bad positioning even when nobody is shooting at you, and it cuts both ways: you can use it offensively by pushing or baiting enemies into it, turning a bad trade into a free kill. The team that treats the lava as a tool wins more engagements here than the team with better aim alone.
The flow is alive, too. During a battle, it advances toward the Airport, so the ground you trusted early on can turn against you later. It is a hazard you learn to read, then learn to use.
Map Layout
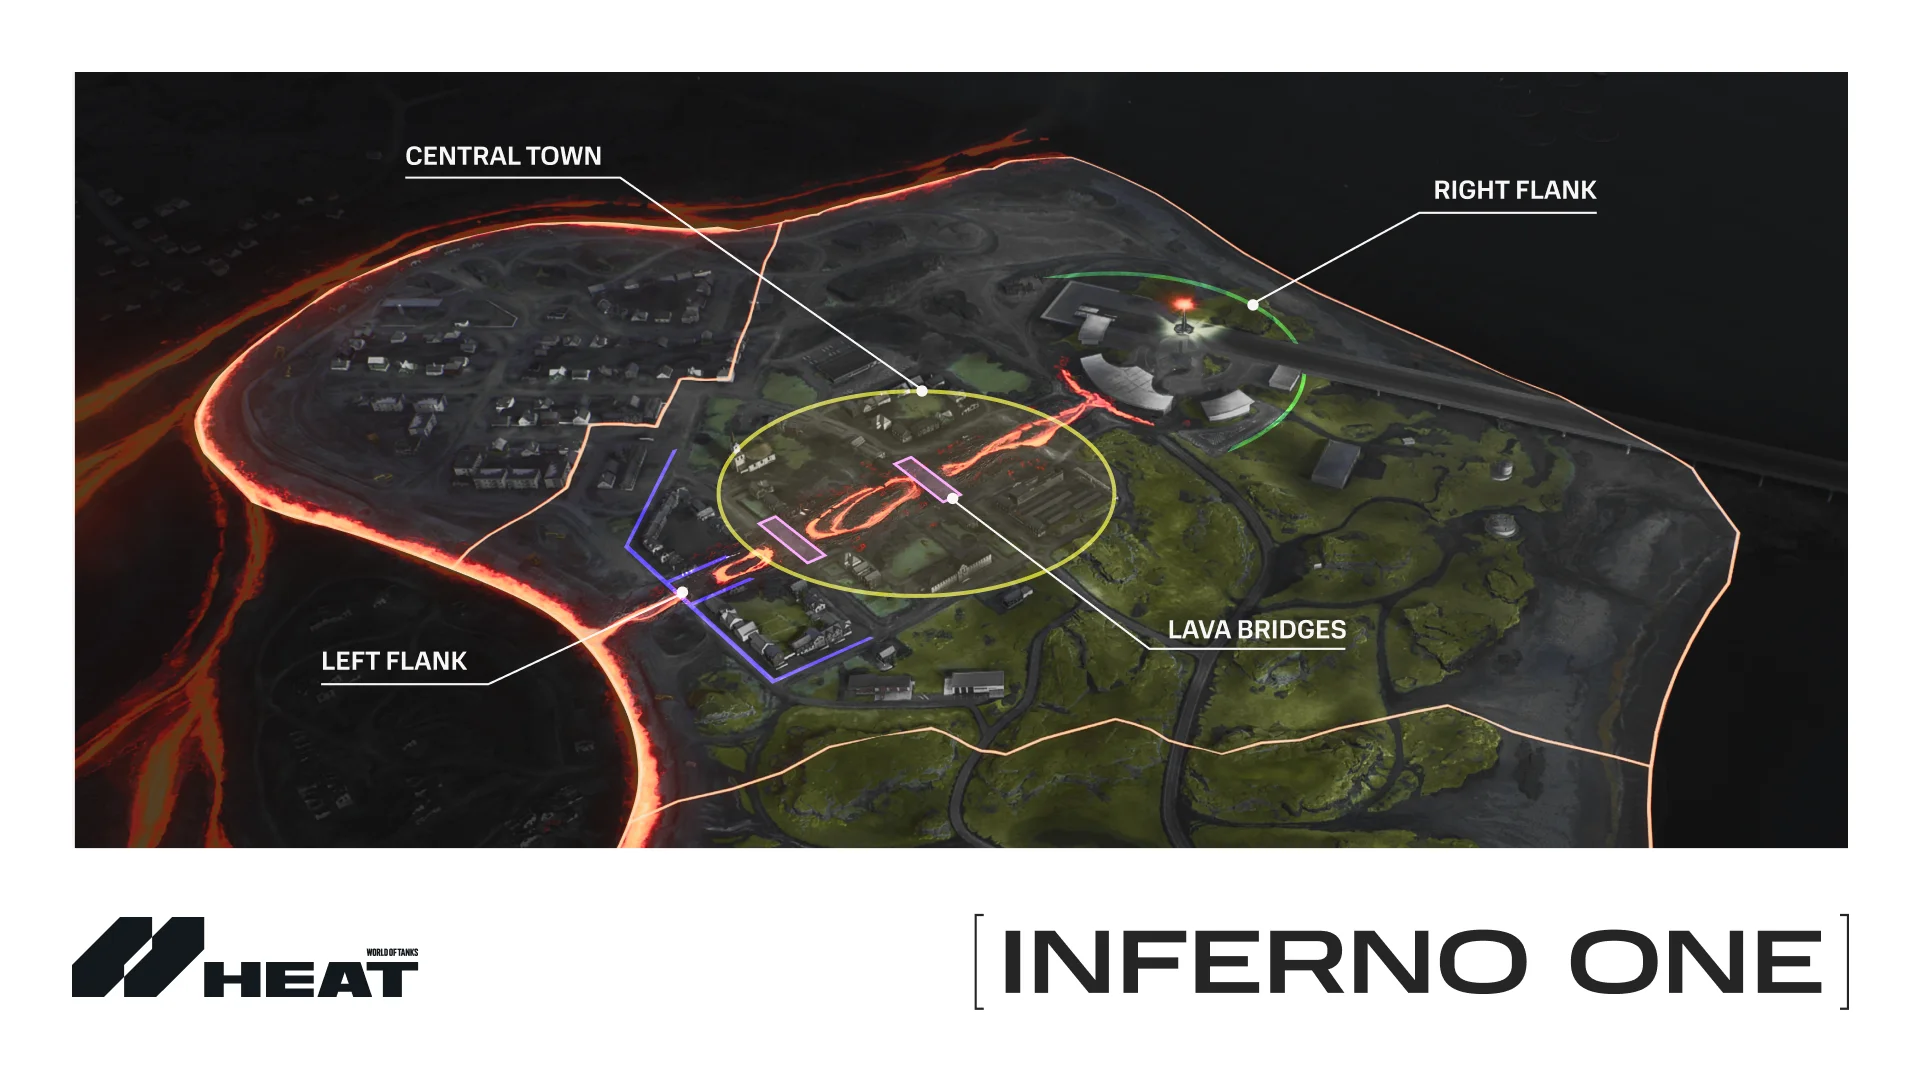
Inferno One map layout: Town Area (yellow), Lava Bridges (purple), Right Flank (green), Left Flank (blue).
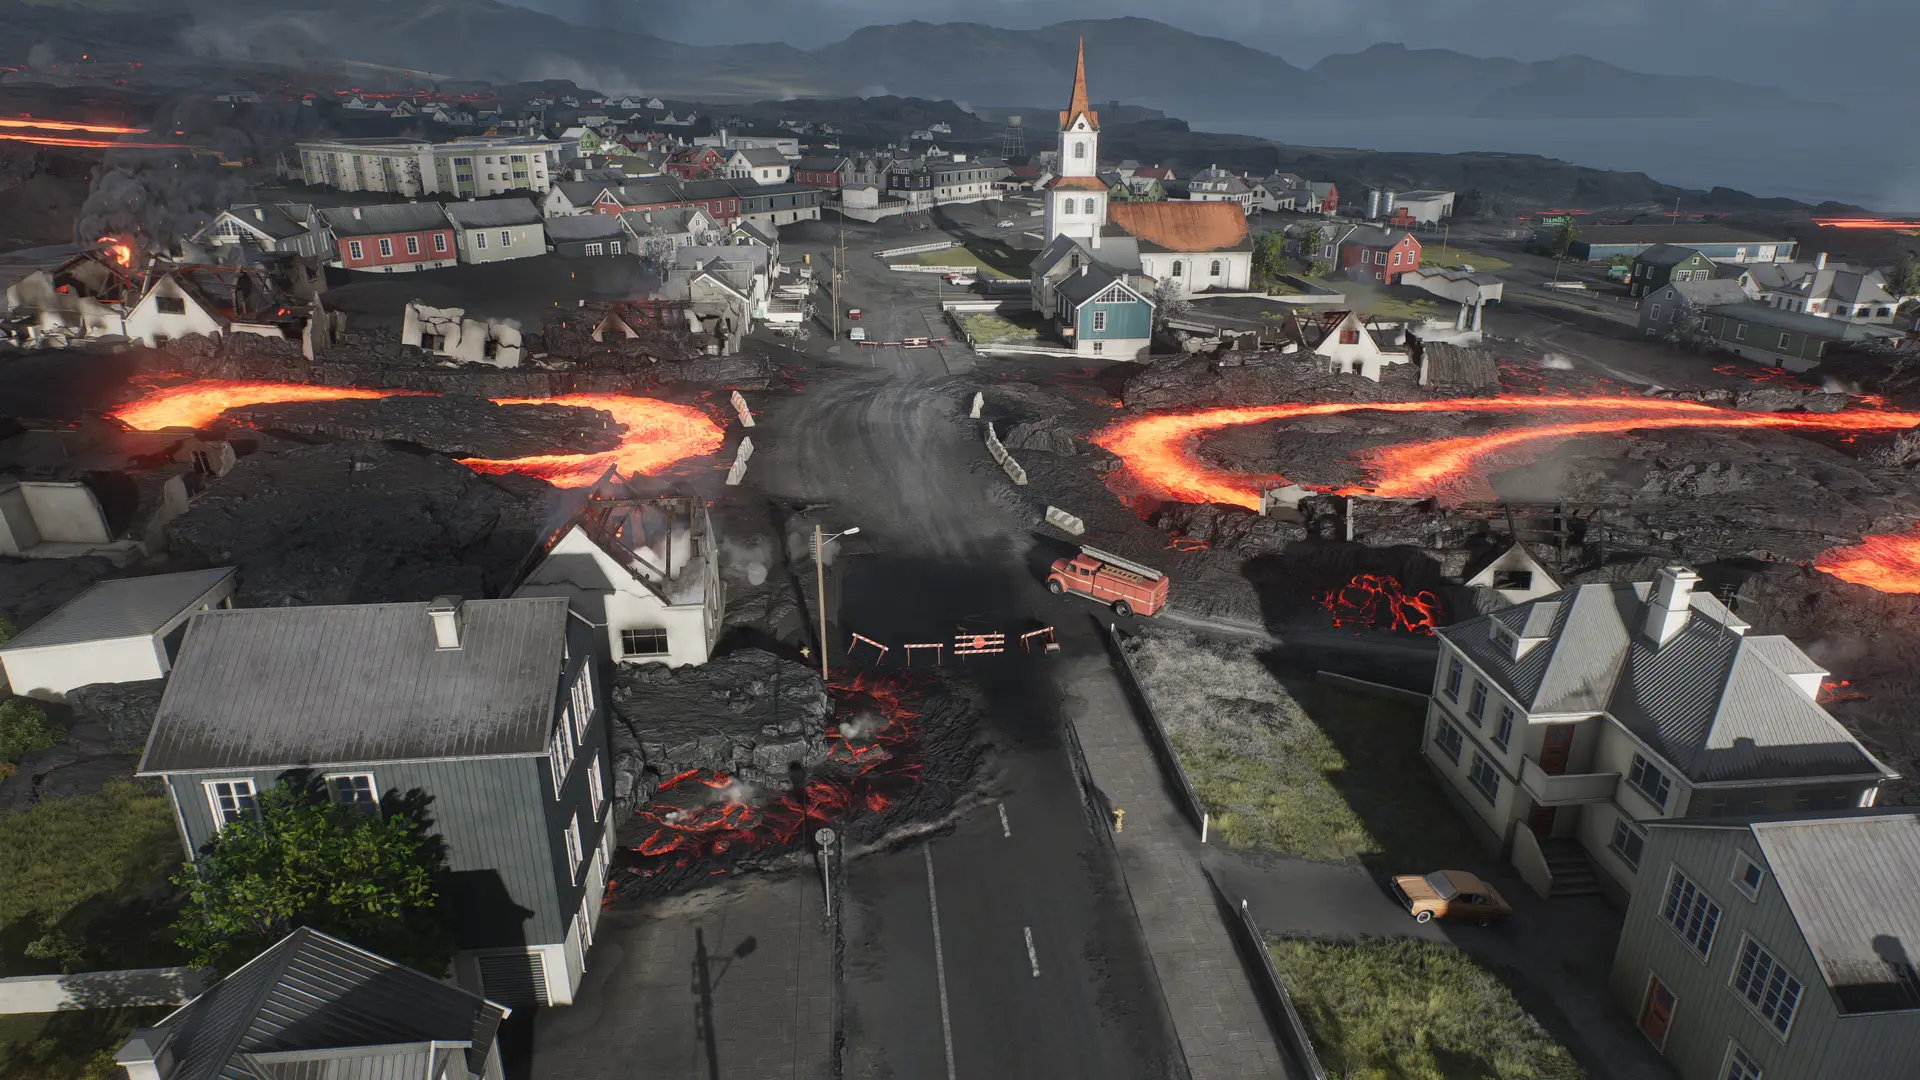
Town Area: the center of the map, filled with buildings. It offers good cover for contesting or defending the middle of the map and the middle bases.
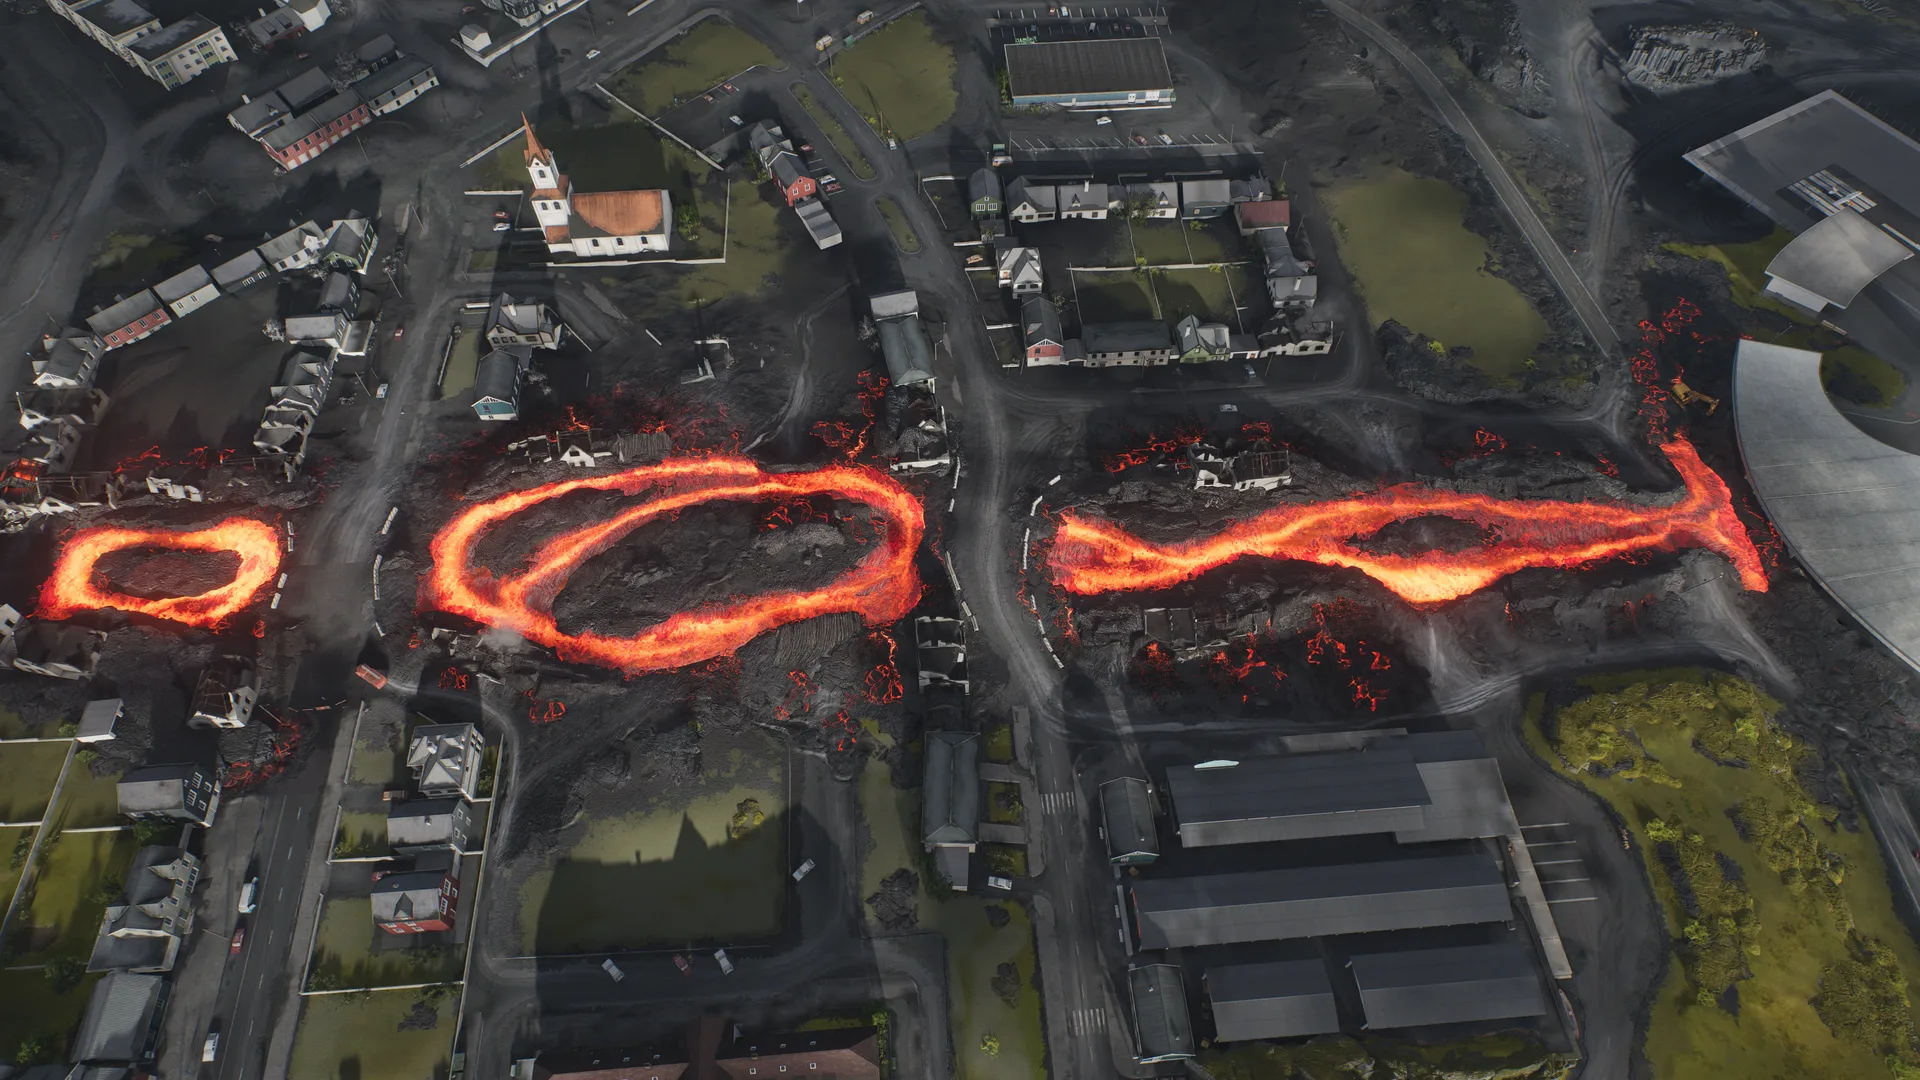
Lava Bridges: two bridges let you cross the lava river from one side of the map to the other. They are heavily contested and can leave you exposed, so take extra care crossing them. Because they are fought over so hard, they are often blocked by vehicle wrecks, which can make crossing difficult.
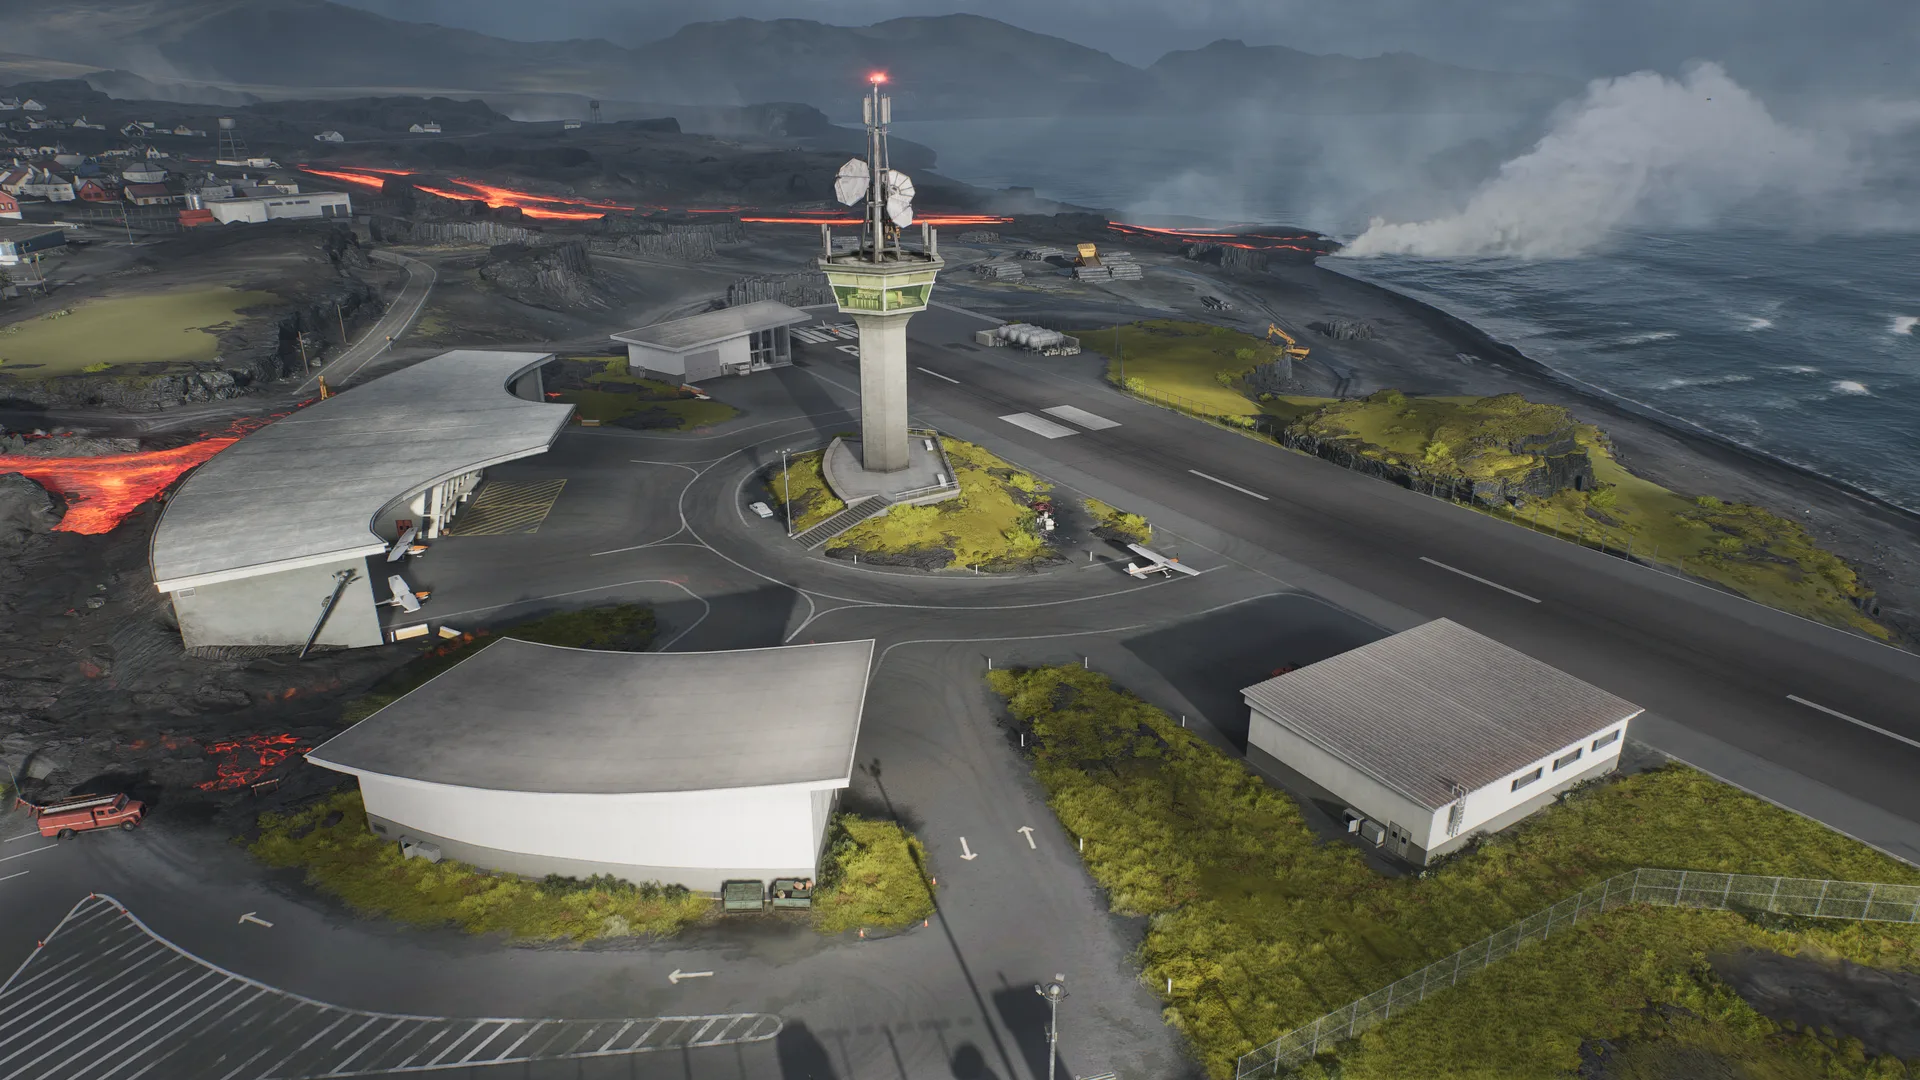
Airport (Base C): a popular place to fight. It gives long-range vehicles open space and close-quarters vehicles cover, so both do well here. It is also where the lava river flows to, so as a match goes on, part of this area gets covered in lava.
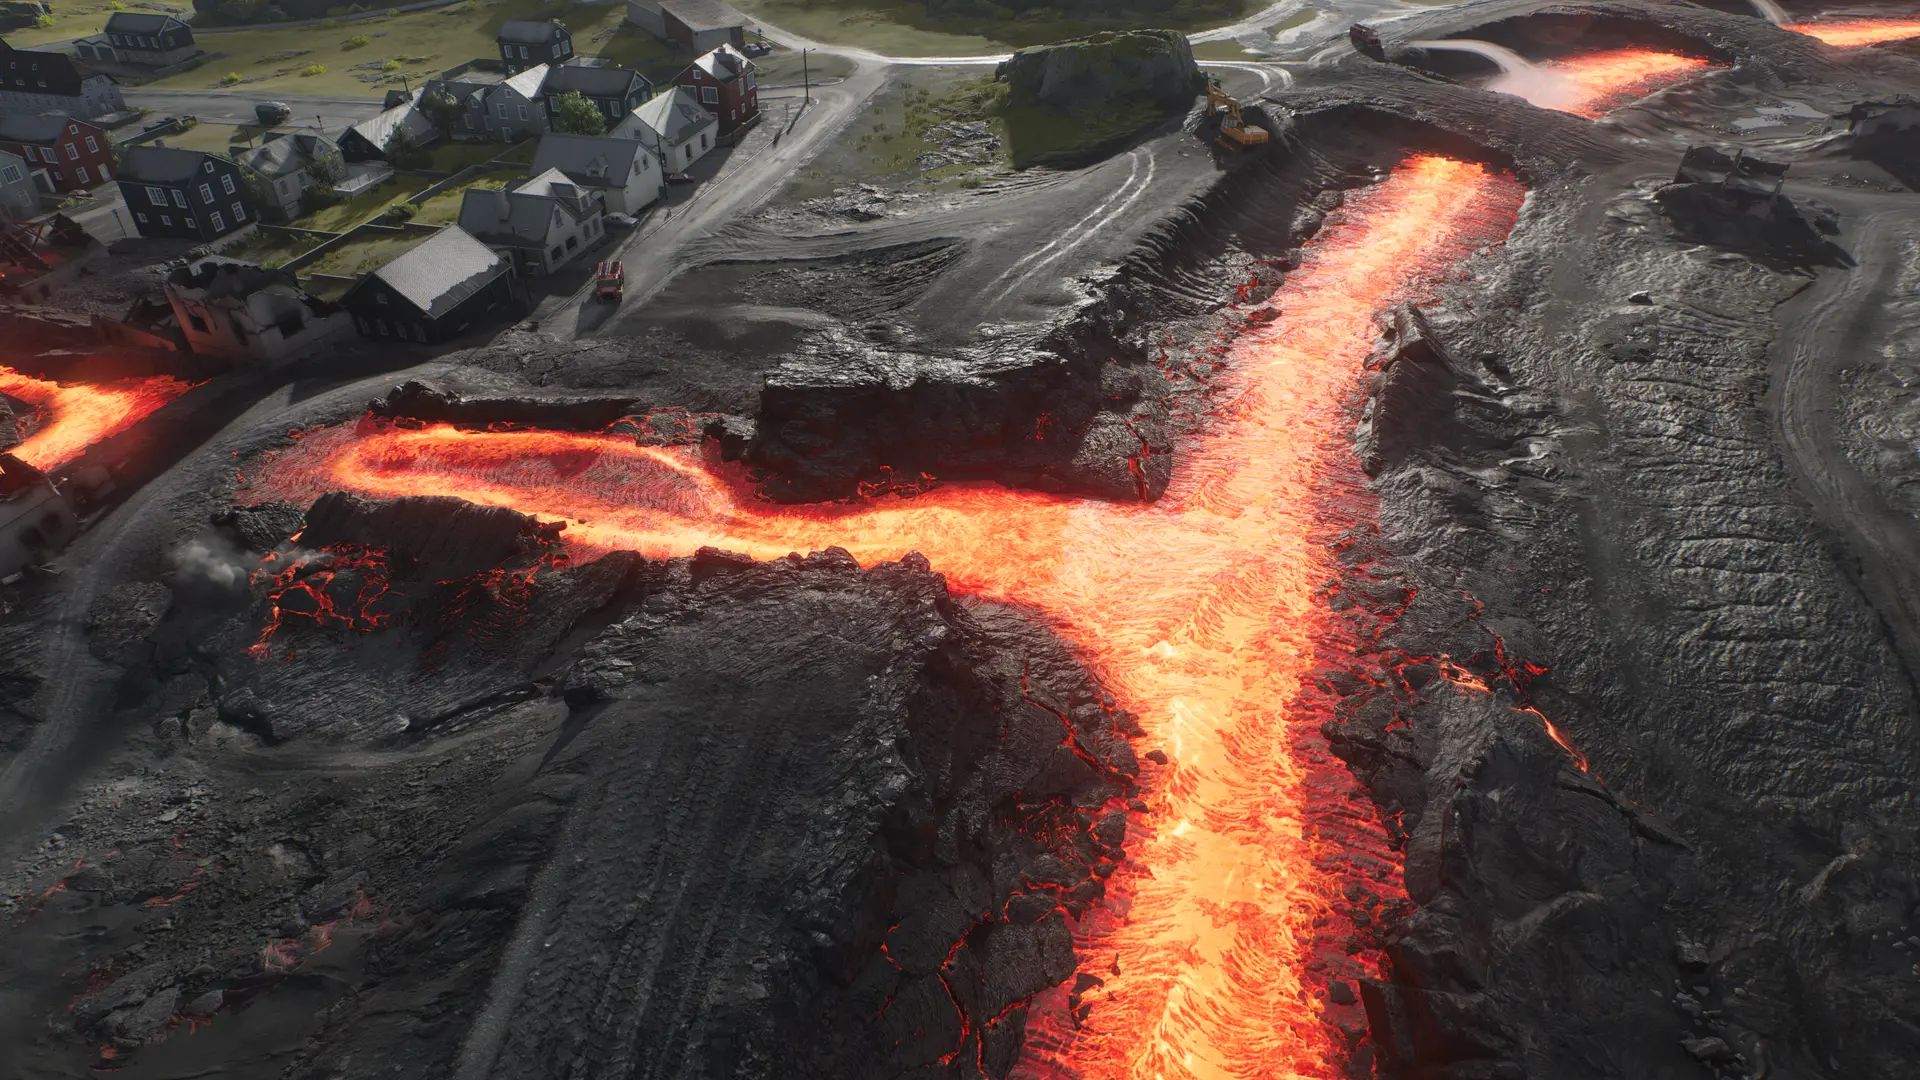
Left Flank: a good spot for snipers to attack from or to help defend the middle bases. It is often contested, so expect enemy presence.
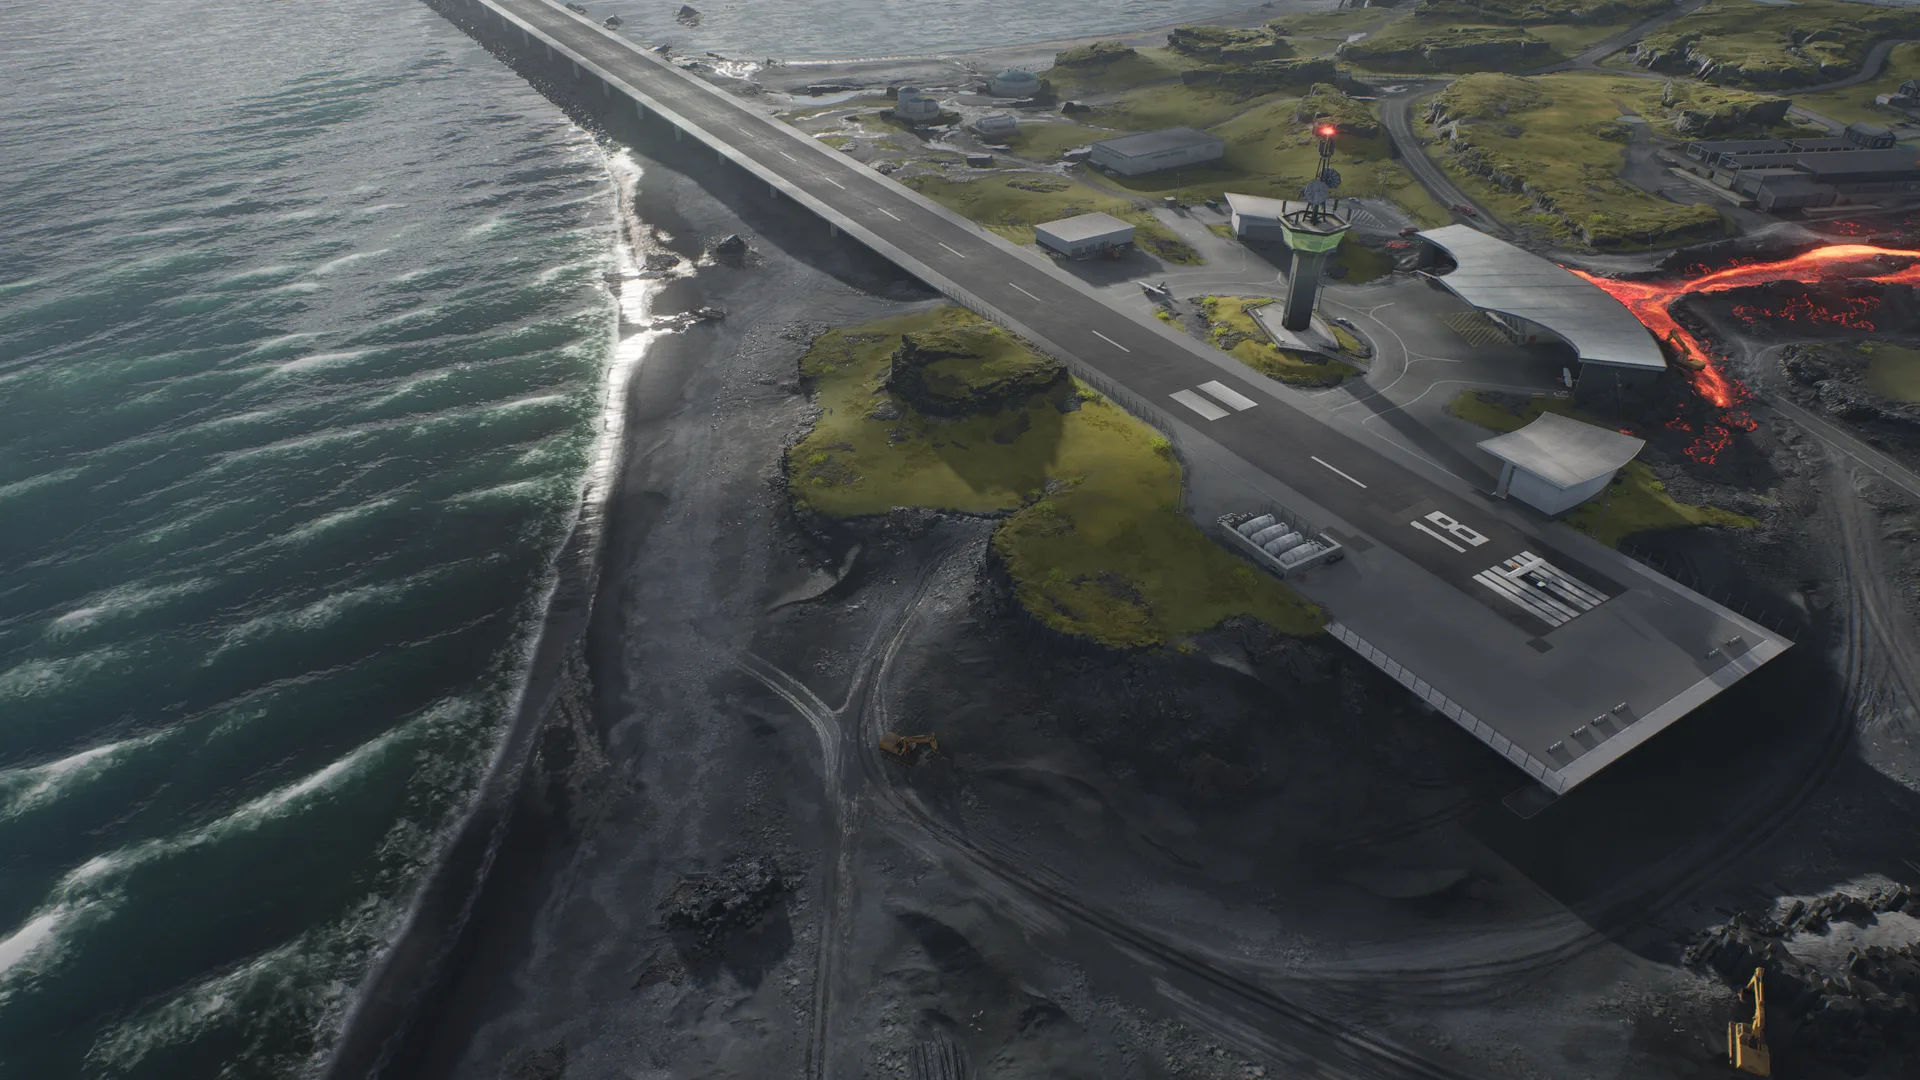
Right Flank: runs around the side of the Airport. Great for flanking the enemy and for hitting their home base in Conquest. It is usually less contested, so flankers can move around the map freely here.
Lava: How It Works
The lava applies Fire build-up and deals damage over time to anyone standing in it. It spreads across the map as a branching network, carving the ground into narrow routes rather than open space. It blocks direct pushes through the town and cuts off easy retreats near the two middle bases.
The lava also moves. As a match goes on, the flow creeps into the Airport (Base C in Conquest) and swallows part of the playable area, so ground that was safe early can be gone later. Watch it spread and adapt your position as it does.
How to Play Around It
- Use it as free chip damage. If you're holding a position where the enemy has to cross a lava-edge approach to reach you, you don't need to win the engagement outright; they are already taking damage before the fight starts. Sit back at a range where you threaten the crossing without standing in it.
- Use it offensively. Positioning or knocking an enemy into lava turns a fight you might have lost into a kill you didn't have to fully earn. This flips the usual defensive framing: an edge that is dangerous to you is exactly as dangerous to whoever you can push toward it.
- You can shove enemy vehicles into the lava river, but make sure you have the weight to do it. A light vehicle like the HSTV-L will struggle to push something heavier like an Ember, and it will take more damage than it deals trying.
- Never fight with your back to it. The obvious mistake, and the one that gets punished hardest is getting pushed or panicking backward under fire near a lava edge. Before you commit to a firefight anywhere near the lava river, know which direction is safe to retreat, and know that a good enemy is trying to deny you that direction on purpose.
Map Strategy
You're really fighting in three places at once: a punishing center you can cross at a cost, and a flank to either side of it.
- Early on, both teams usually commit to a flank each rather than the center, since the center is expensive to contest before you know where the enemy weight is.
- Whichever side wins their flank first has a choice: push the enemy's now-undefended flank, or peel inward and hit the town and lava chokepoint from the side instead of head-on. The second option is usually stronger; it collapses the center fight instead of just trading a point.
- Don't get tunnel vision holding a flank after it is secure. Use it to pressure the center or rotate support to a contested base.
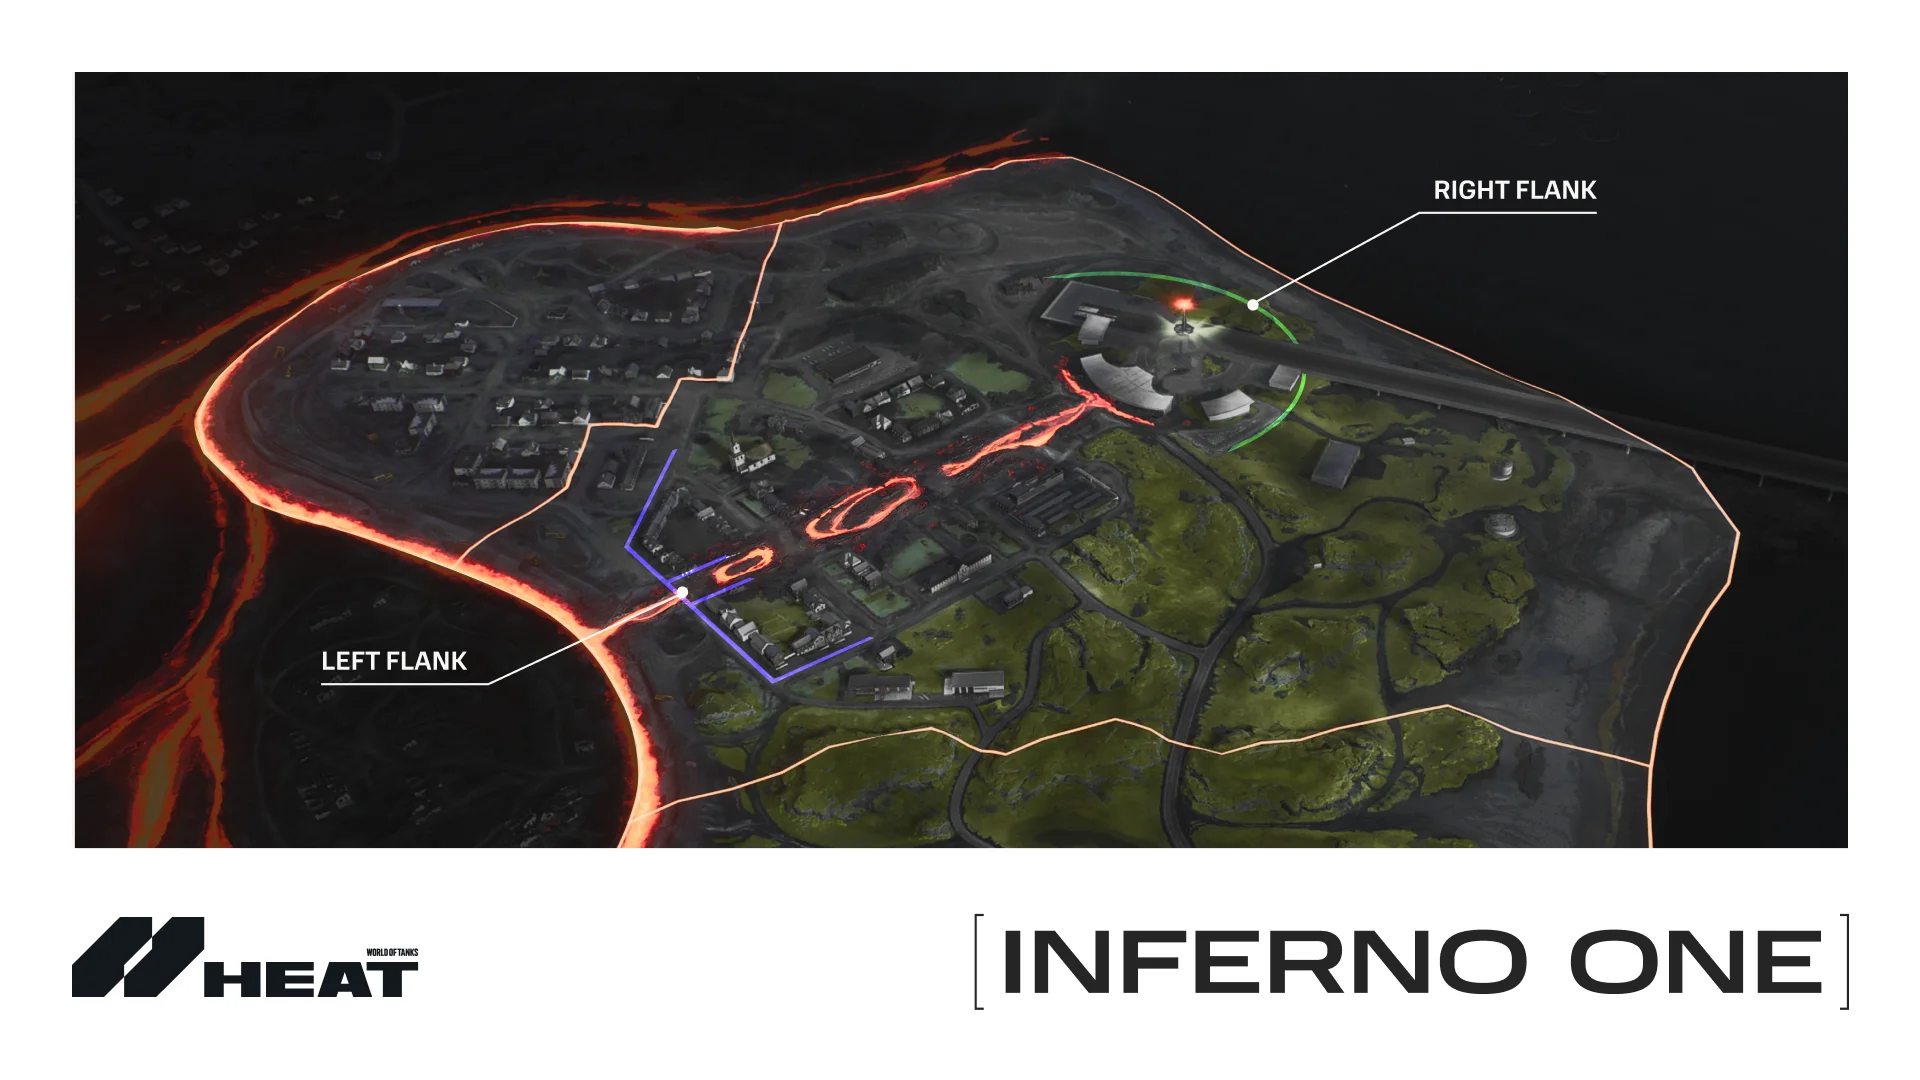
The two flanks: Left Flank (blue), Right Flank (green).
Left Flank
Rewards vehicles that want sightlines: the elevated terrain looks down into the town and the lava, so this is where anything with reach should head early.
Right Flank
Tighter, and more about cover-to-cover movement around the side of the Airport. A route to hit the enemy's side, and their home base in Conquest, without crossing the main lava river at all.
Center
- Crossing the center is a deliberate trade-off. The direct route through town and the lava is often the fastest way across the map; it's just not free. Cutting through means arriving faster but chipped, so it's a real call: worth it when speed matters more than the health cost (racing to contest a base, finishing off a low-health enemy, repositioning under time pressure), and not worth it when you would arrive too weak to fight. Compare that with the flanks, which take longer but cost nothing but time.
- Respect the capture points in the middle. These are worth the most because they cost the most. Whoever is actually sitting on the point has very limited room to reposition or disengage.
- Don't solo-cap here. Bring at least one teammate to watch the approach while the capturer holds still and is vulnerable.
- If you're attacking a point being held in the middle, you don't have to dislodge the defender by force: deny support from reaching them, and the geography does some of the work for you.
- If you're defending it, rotate reinforcements early. By the time you're calling for help, the attacker is already through the only way in.
Common Mistakes to Avoid
- Crossing the center out of habit instead of as a deliberate trade-off.
- Winning a flank and stopping there instead of using the momentum on the center.
- Forgetting which way is "away from lava" mid-fight, and forgetting the enemy is trying to take that direction away from you on purpose.
- Trying to push a vehicle heavier than yours into the lava: you'll take the damage and it will barely move.
Bring these calls into your next match, and compare notes with other Agents on Discord.
Join the Discord